Texas Sheet Cake Balls

I was having a little get together to show off my new grandson and wanted to serve snacks but I didn't want to have to use silverware. My daughter's favorite cake is Texas Sheet Cake and that was her request, but that meant that forks would be necessary. Or were they? Cake balls are all the rage these days so I decided it was time for me to give them a try. The first thing was to make a Texas Sheet Cake. This is a cake that has been around forever. It's super easy to make, very moist, and chocoholics love it. Here's what you'll need:

  • 2 C flour
  • 2 C sugar
  • 1 C water
  • 1 stick butter
  • 1/2 C oil
  • 5 TBL cocoa powder
  • 1/2 C buttermilk
  • 1 tsp baking soda
  • 1 tsp vanilla

Icing

  • 1/3 cup water
  • 1/2 stick butter
  • 3 1/2 tablespoons cocoa
  • about 11 tablespoons sifted powdered sugar
  • 3/4 cup chopped nuts 
  • 3/4 cup coconut 

Frosting for balls

  • 3/4 cup unsweetened cocoa
  • 1 stick butter, softened
  • 3 - 4 tablespoons heavy cream
  • 1 teaspoon vanilla 
  • 3 cups confectioners' sugar
  •  

    First thing is to make the cake. In a bowl, combine the flour, sugar, and a pinch of salt.  In a microwave safe bowl, heat the cocoa, butter, oil, and water until the butter is melted and whisk until well combined.

    Add this to the dry ingredients--stir well. Now add 2 eggs, beating after each addition. Dissolve 1 teaspoon baking soda in 1/2 cup buttermilk and add to batter. Add 1 teaspoon vanilla. Beat all of this well and pour in greased and floured sheet pan.  

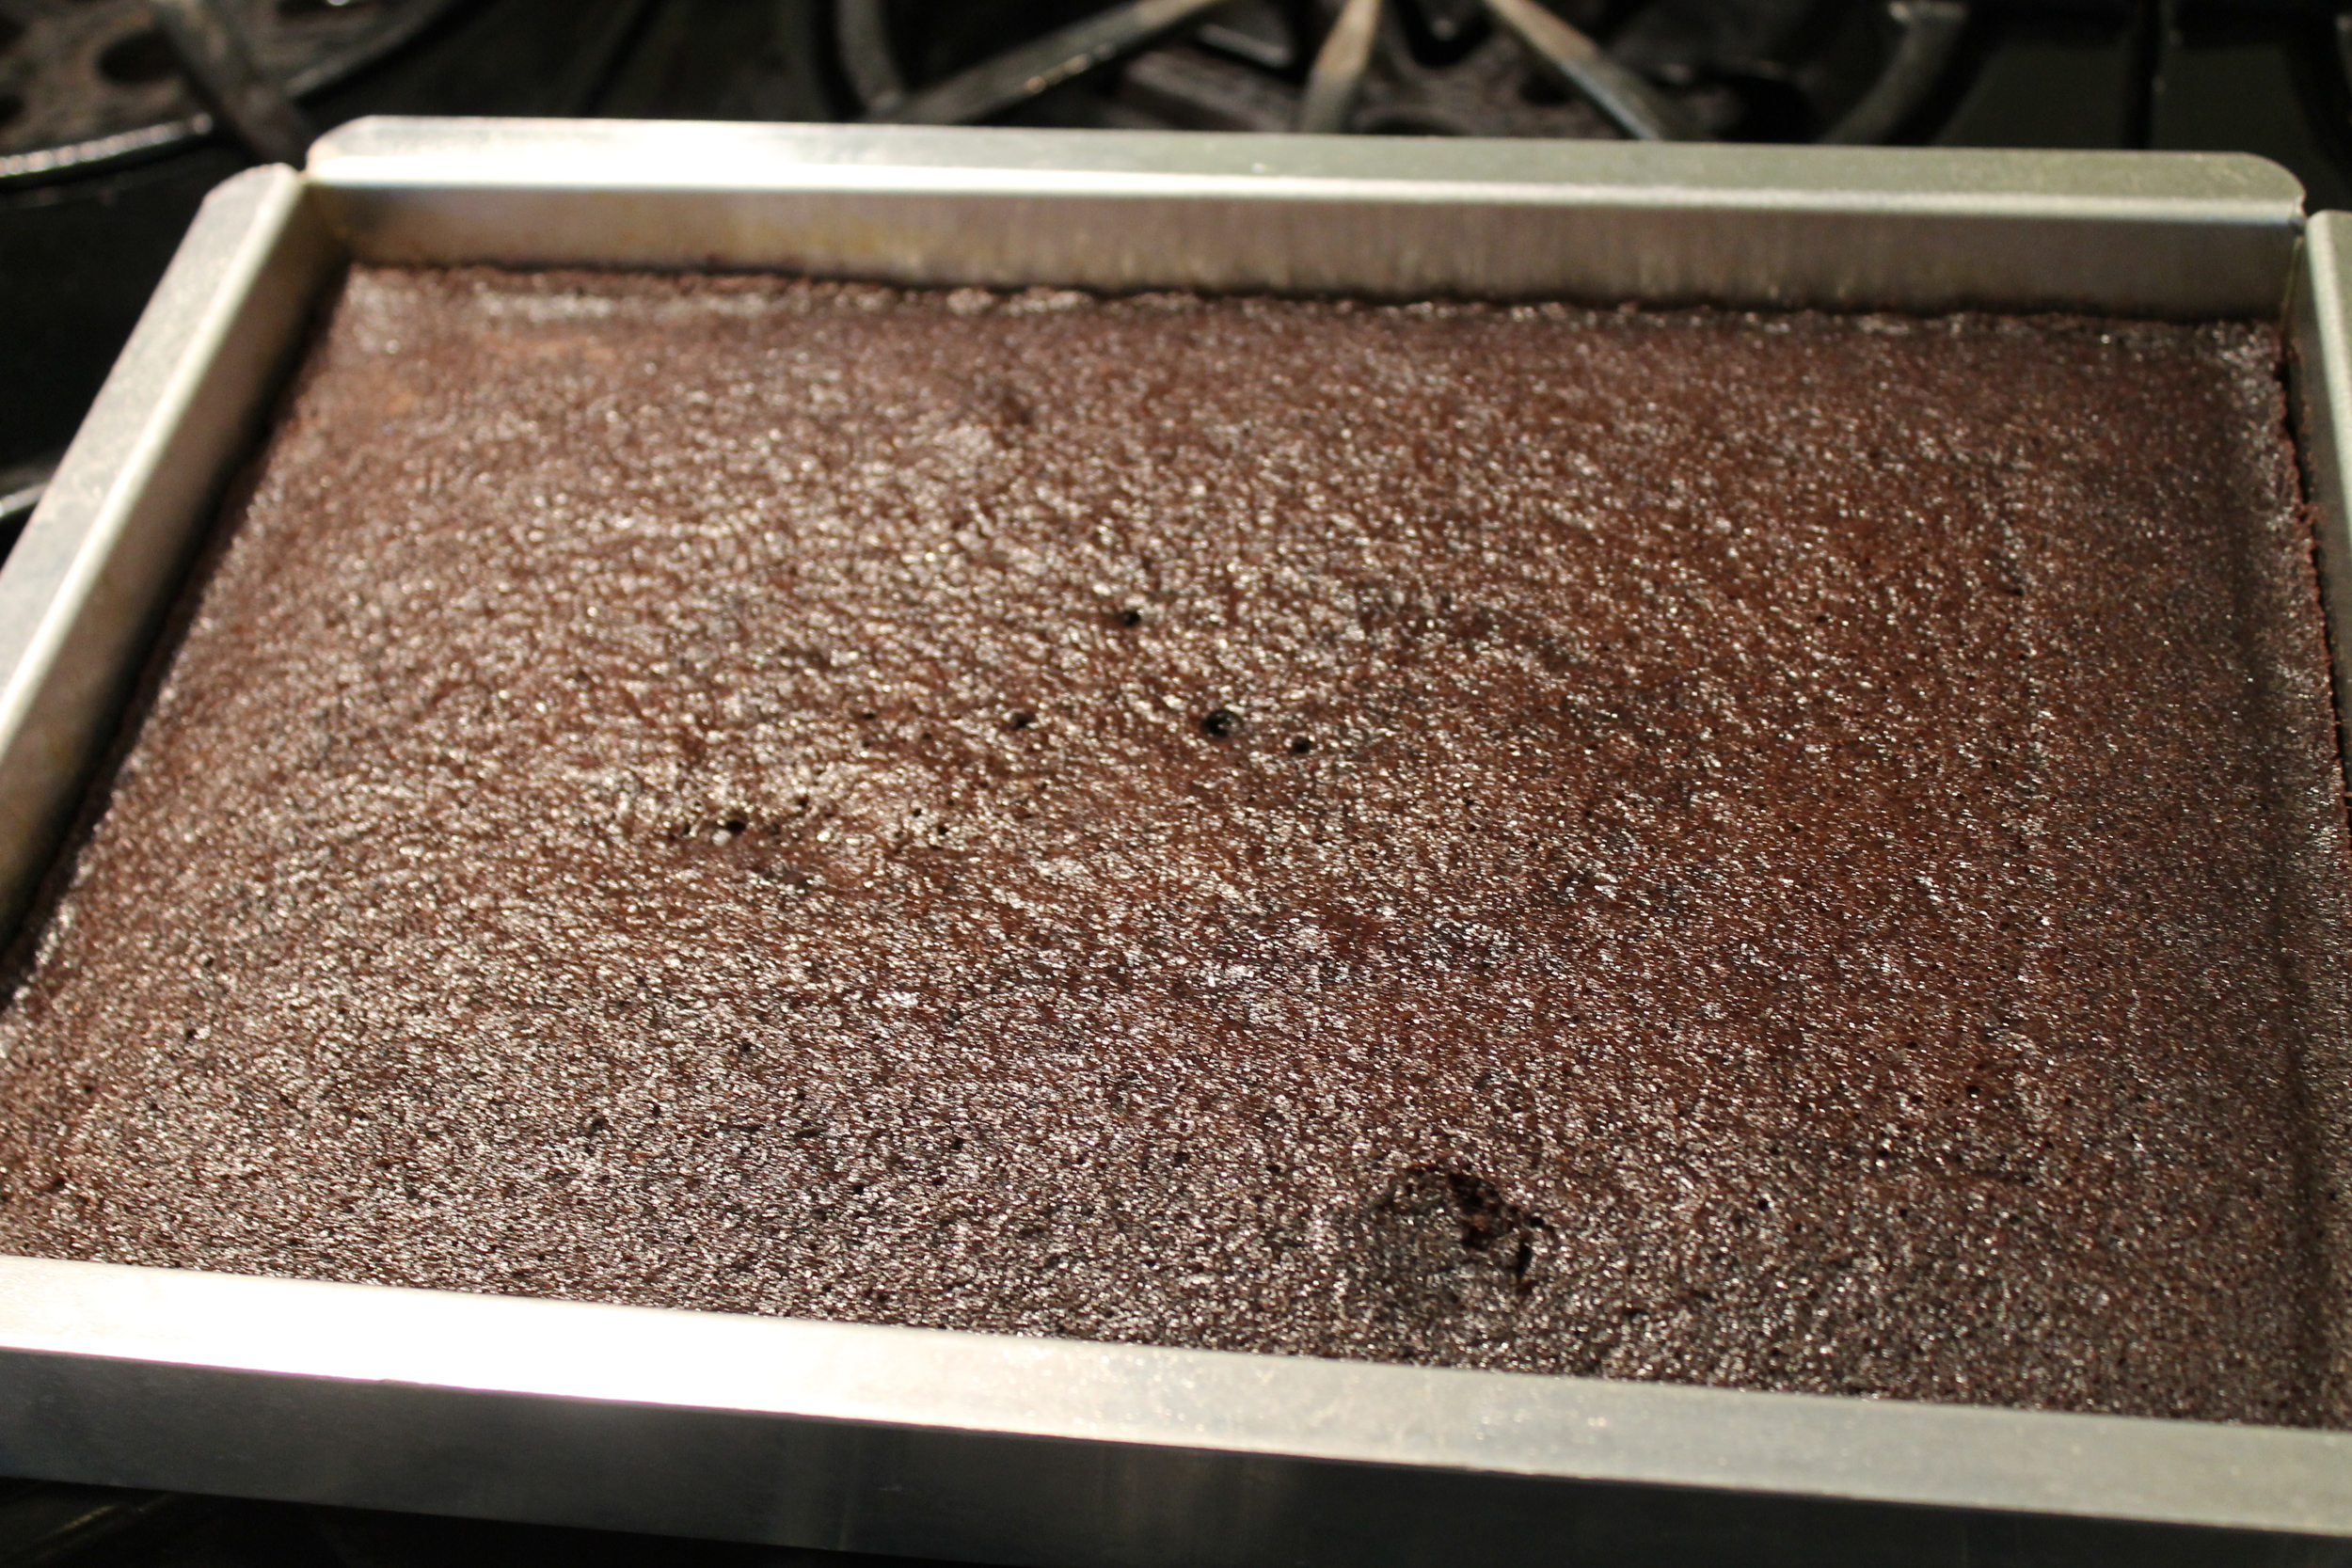
    Bake at 350 for about 30 min.  


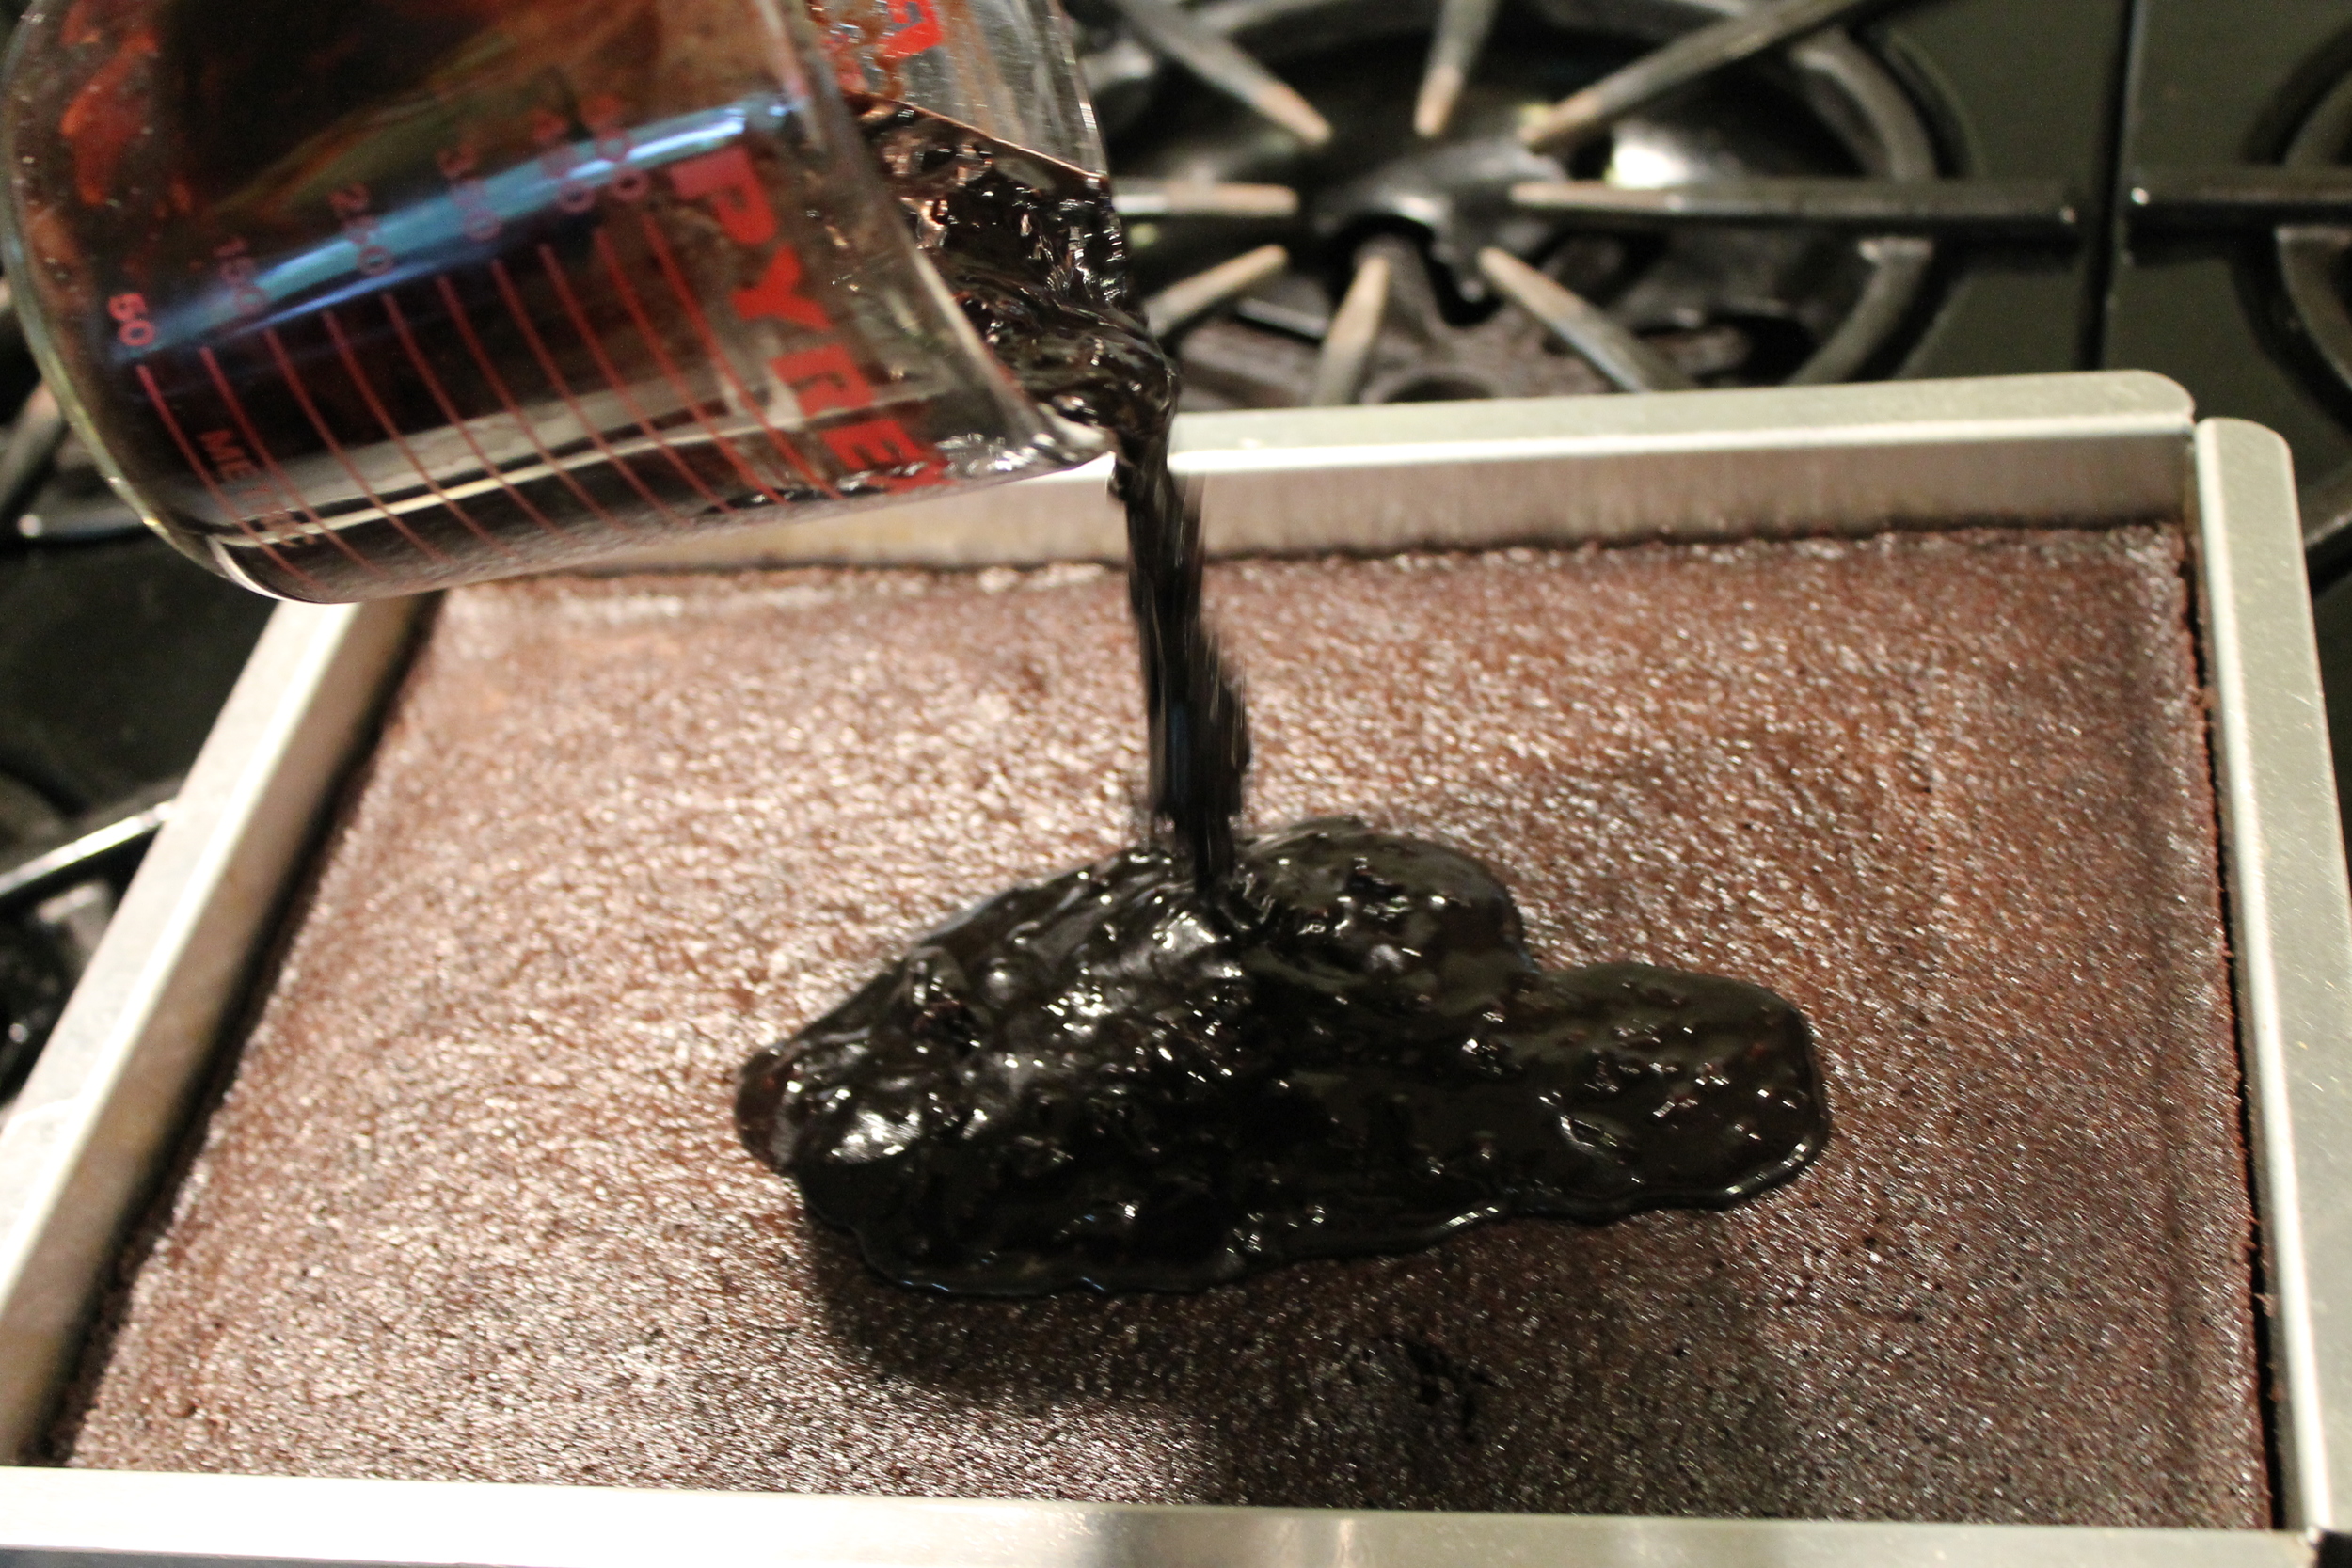
    While the cake is baking, you can make the icing.  In a sauce pan, combine  1/3 cup water. 1/2 stick butter, 3 1/2 tablespoons cocoa and heat for about 1 minute. Add about 11 tablespoons sifted powdered sugar, stirring to combine. Add 3/4 cup chopped nuts and 3/4 cup coconut and stir. The icing should be loose enough to pour onto the cake. As soon as the cake is done, pour the icing on, spreading it to cover.


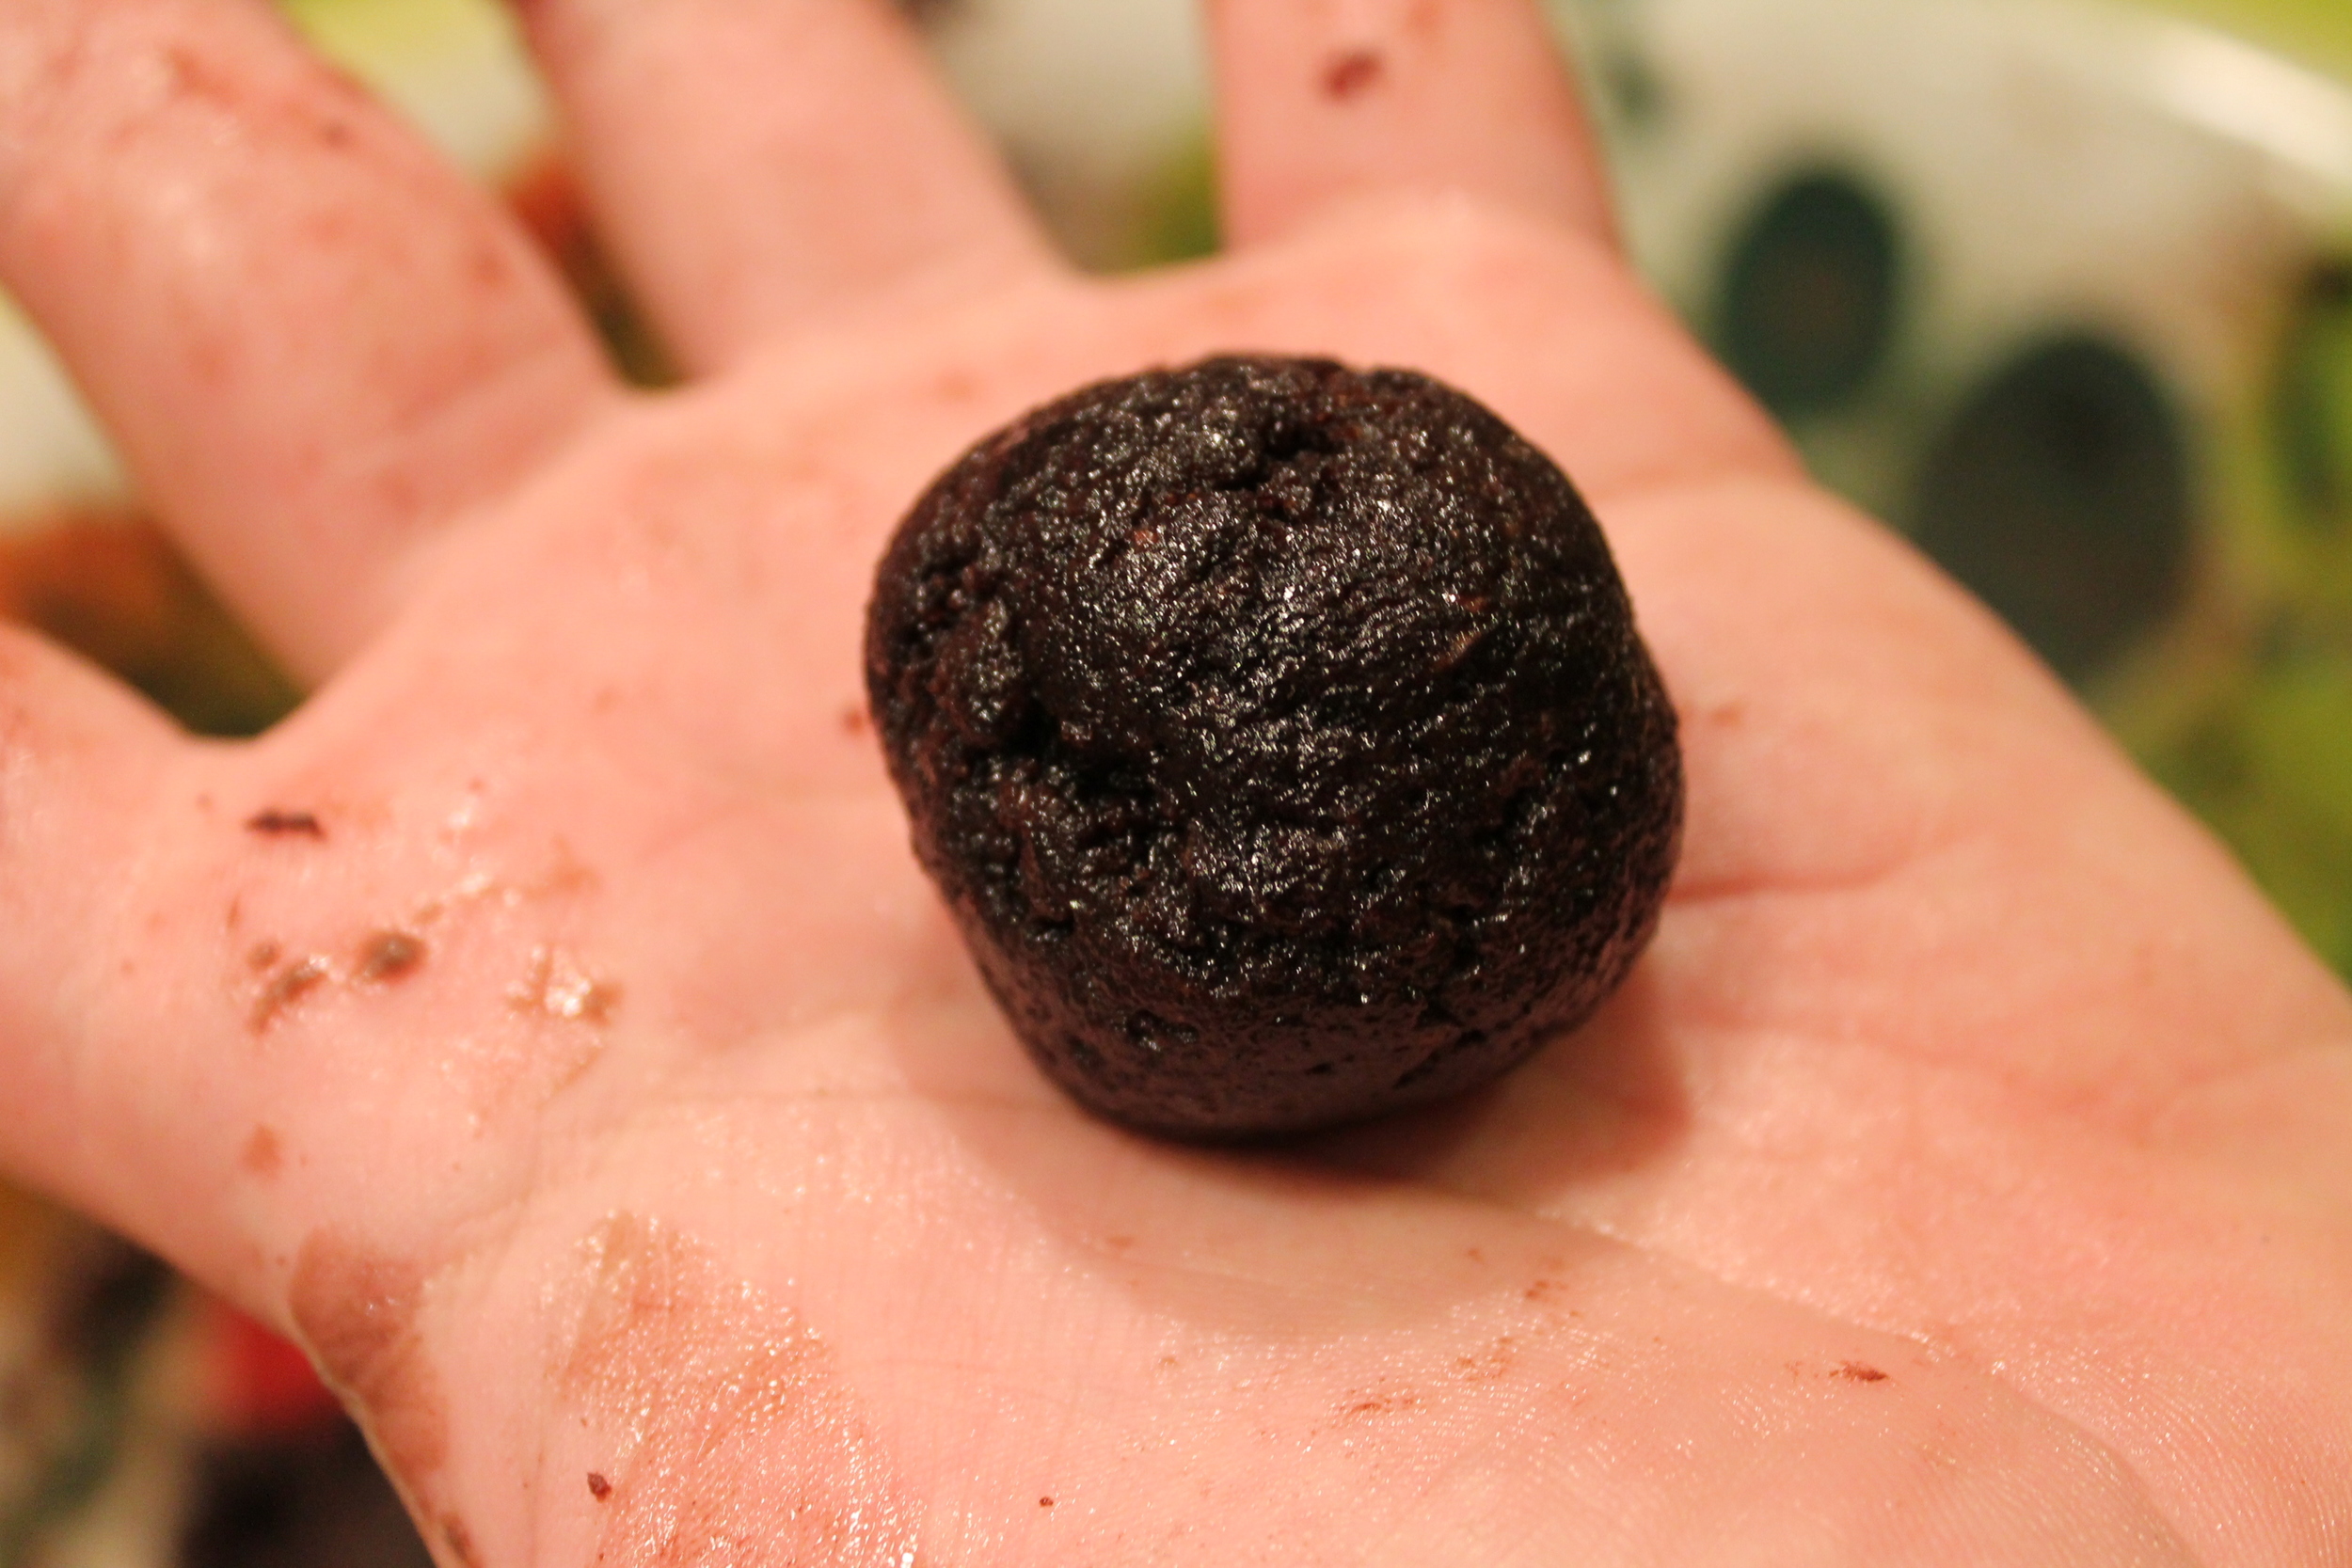
    Once the cake has cooled, it's time to make the cake balls. In a big bowl, crumble the sheet cake. Just use your hands and break it apart until it's pretty evenly broken down into crumbs. Now you have to have something to bind the crumbs back together. How about more icing? 

    Sift sugar and cocoa together into a large bowl. In another bowl combine 1 cup of sugar mixture with butter and 1 tablespoon cream, beating until smooth. Add another cup of sugar and another tablespoon of cream, beating well. Continue until all ingredients are combined and frosting is fluffy. Beat in vanilla. Now start adding the frosting to the crumbs, one big spoonful at a time.

    This is a feel thing. You want just enough frosting mixed in to hold the crumbs together to make the balls. The easiest way to figure it out is to just test it. Using my small cookie scoop, I scooped up some of the mixture and rolled it into a ball. You don't want to have to pack it for the crumbs to stick together, because you can do that without adding any frosting at all. The problem is, they will fall apart without the frosting. The frosting is the binder. 

    Now you just roll them all. I would like to be able to tell you how many this made, but the problem is that so many people were "tasting" along the way that I don't think my count would be accurate. I decide to pretty them up a bit by drizzling them with melted white chocolate chips. Then I refrigerated them to set. They were pretty and delicious. We had plenty left over so I froze them and they freeze beautifully! Great to pop in your mouth frozen or thaw and eat. 

    I used pretty skewers to serve them. I was so excited to show off my grandson that I forgot to take a picture of the final product. Sorry!

    Enjoy! 

    Lynn

    Fondue Party

    I wanted to host a birthday party for my college roommate, but I wanted to be able to be part of the party too. You know if you've hosted very many parties that this is often easier said than done. Another friend of mine, Sara, told me about a party she hosts every year that she says is the easiest and most fun for her--fondue! I'm talking old school, 70's type fondue where you heat up oil and cook your meat and veggies at the table. She was also gracious enough to loan me her fondue pots and her dishes. The pots are necessary, but the dishes are just a nice touch. And did I mention that she also gave me her sauce recipes and recommendations for meat and veggies? Yes, she's a sweet friend. The party was a raging success! We sat at the table much longer since we had to cook our food, which meant we had more time to visit. AND, the food was delicious!!

    Here's what I used for the party: 

    • fondue pots (I suggest 1 for every 4 people)
    • peanut oil
    • tenderloin or rib-eye, cut into about 1" cubes (1/4 lb per person) 
    • sushi grade tuna, cut into about 1" cubes (1/4 lb per person)
    • broccoli florets
    • whole mushroom caps
    • assorted sweet peppers
    • pearl onions
    • assorted bread
    • Garden Salad with Oranges and Candied Almonds

    The morning of the party, marinate the meat. After about 8 hours, drain and pat the meat dry and refrigerate until ready to use. You really want to make sure the meat is dry so that it doesn't splatter when you cook it in the hot oil. Here is Sara's recipe:

    Meat Marinade 

    • 1 & 1/4 c. Soy Sauce
    • Splash of Worcestershire Sauce
    • 1 Large Onion
    • 2 Cloves Garlic (or 1 tsp. chopped)

    - Blend all ingredients in blender.

     -Pour over meat to marinate. (about 8 hours)

    Then I set up my outdoor dining room table. I bought some plastic coated fabric to cover the table because I knew that oil drips and spatters were going to be part of the deal. I set up the fondue pots which took some planning to get all the cords situated and out of the way. I taped the cords to the table and I wrapped them around the table legs and taped them to the floor. The one thing I did not want to have to worry about was anyone tripping on a cord and spilling a pot of hot oil! No other decorations are needed because the food ends up being the center piece. Notice that I used paper napkins too.


    Since there were 14 of us, I also used the coffee table on the deck. I just pulled up 2 ottomans and 2 poufs. This table got its own fondue pot too. 

    A couple of hours before the party, I got all the veggies ready and made the Garden Salad with Oranges and Candied Almonds. Aren't these colors great?  I also cubed the bread--it was delicious after it was fried!

    About an hour before the party, I got the marinade for the tuna ready and put the oil in the pots but didn't turn them on yet. The tuna only needs to marinate for about 30 minutes so that it doesn't start to cook in the marinade. I also made the sauces. Here are Sara's sauce recipes: 

    Horseradish Mayo Sauce

    • 1 c. Sour Cream
    • 1/4 c. Mayo
    • 1/4 c. Horseradish, drained
    • Salt to taste
    • Cayenne Pepper to taste

    Dijon Caper Sauce

    • 1 c. Sour Cream
    • 1/2 c. Dijon Mustard
    • 3 Tbsp. Lemon Juice
    • 3 Tbsp. Capers
    • Sea salt to taste
    • Ground Black Pepper to taste

    - Heat ingredients in saucepan, and serve warm.

    Here is the marinade I made for the tuna: 

    • 2 C orange juice
    • 1/4 C sesame oil
    • 2 inch piece of fresh ginger, sliced into discs
    • 1/2 C olive oil
    • 3 cloves garlic, smashed

    Put all in a zip top bag and add the tuna and refrigerate for 30 minutes. Drain after 30 minutes and pat dry. Refrigerate until ready to use.

    About 15 minutes before you want to sit down to dinner, turn on the pots to heat the oil. You'll want it to be about 350 degrees and each pot is slightly different, so just read your manufacturer's direction. Now just sit down, start cooking and have fun! Be sure to remind your guests to let whatever they are cooking cool a few minutes on the plate before they eat it...


    I now have 2 fondue pots of my own as well as plates because this was a party I want to repeat. The only blunder of the night was that I was having such a good time that I forgot to take pictures, so you'll just have to use your imagination for the rest. 

    I'll keep you posted... 

    Lynn

    One cautionary note--A friend of mine said she went to a fondue party and they were sitting at a glass table and the heat of the fondue pots broke the glass and everything ended up on the floor! Luckily no one was hurt. So the lesson is, glass and fondue don't mix. 

    Happy Hour

    I decided to host a Happy Hour for some of my girlfriends. What to serve?? Wine and beer, obviously, but what about food? After a little planning, this is the menu I came up with:

    I know that seems like a lot, but I always make way more than I need. I just can't help myself, and it's nice to have leftovers to snack on. 

    I set everything up on the deck and it was a nice cool night. Good food, good friends, good conversation. What more could a girl ask for?

    I love combining different serving pieces. Here I used rustic wood, tin, and white ceramic.

    ​Desserts!!!

    ​The tiered serving piece is a favorite because I can really load it up. The top holds grapes and cherry tomatoes. The second layer holds the Hawaiian pork sliders and the prosciutto wrapped artichoke hearts. The bottom holds the shrimp skewers, watermelon, and assorted bread and crackers.

    Click on the links to get the recipes, and have fun! 

    Enjoy! 

    Lynn